AVR ISP 10 pin for programming
Hooking up AVR to programmer
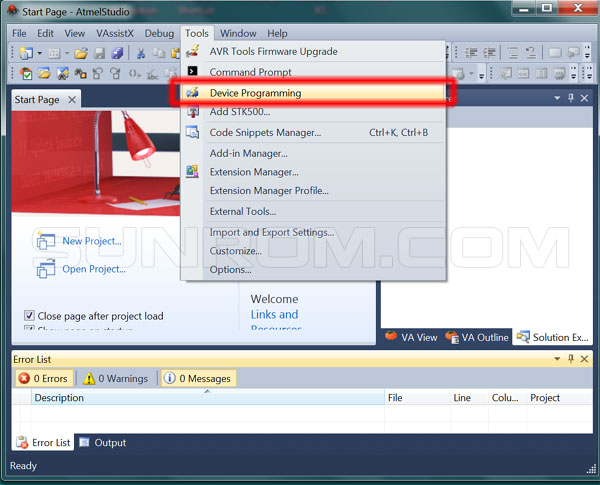
Using Atmel AVR Studio V6 for Programming
Install AVR Studio and Start from desktop icon or start menu.

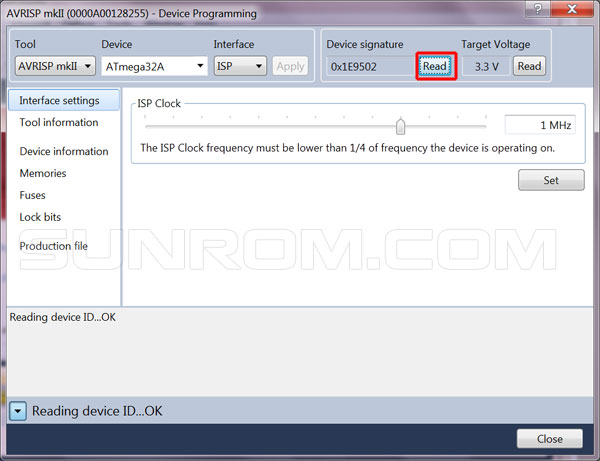
Select Device Programming
Select Programmer
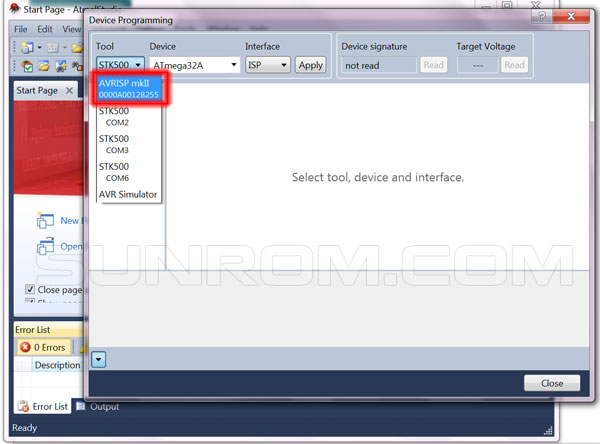
Select Device and Click Apply

Read Signature, 0x1E means Atmel and 0x95 is device signature
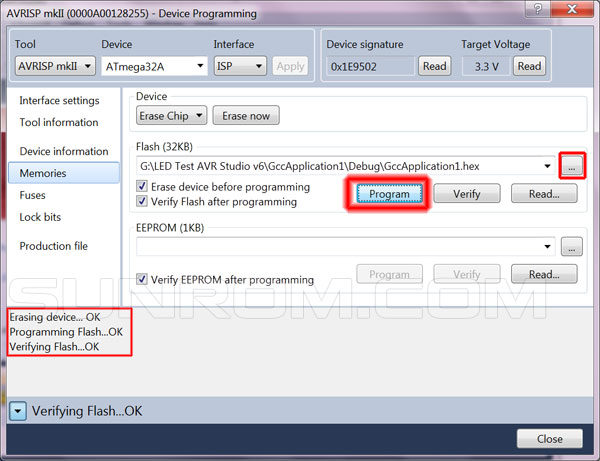
Select a HEX file and Program button, If all OK you will get OK messages. If any errors then try lower ISP speed.
Faster programming with F5 key in Atmel Studio 6 during Development
The Device Programming dialog in Atmel Studio 6 is modal, which means you must close it after you are done programming in order to go back to editing your source code. It takes 4 clicks to open up the dialog and initiate the programming process again. This section describes a different method for programming that will allow you to compile and program simply by pressing F5.

First, in the View menu, select “Available Atmel Tools”. This will bring up the “Available Tools” window. Make sure that there is AVR ISP in the list of connected programmers.
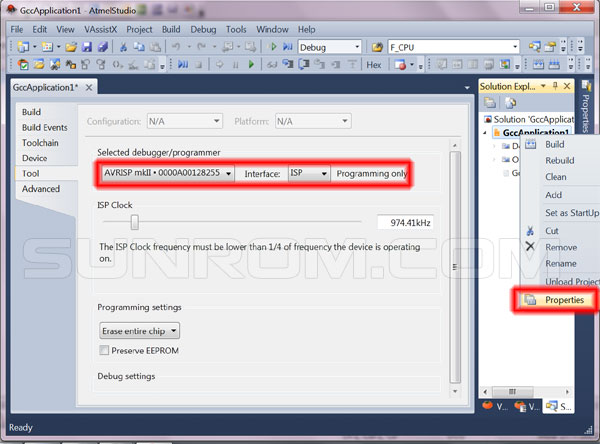
Next, open the project properties window by opening the Project menu and selecting “Properties…”. In the Tool tab, select AVR ISP as the debugger/programmer, and select ISP as the interface. You will only have to do this once per project. You can also set the ISP Clock speed here but please note that the frequencies displayed in Atmel Studio are not correct when you are using the USB AVR programmer. It is a good idea to set the frequency to something 1 Mhz at first and to try increasing it later once F5 programming is working.
Finally, you should be able to press F5 to build your project and program the resulting HEX file onto your AVR! Alternatively you can program by selecting either “Continue” or “Start Without Debugging” from the Debug menu.